Archives for posts with tag: color print

IMG_0679

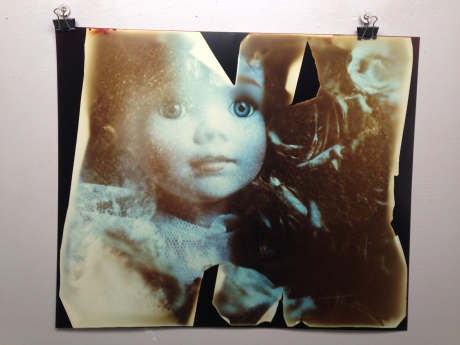
In my last post I wrote about my experience last Summer in my favorite class, Custom Color Print. Here is another photograph I was able to create and print in the Color Darkroom. The first image shows the finished product, and the images below show the process. I started first with a Large Format 4×5 piece of Slide Film from a view camera, and a 20×24 piece of expired photo paper. In the color dark room, I exposed my slide unto the large paper and made a print. Taking a slide, which is a positive, and printing it directly unto the photo paper results in the image being printed as a negative. Once I had my 20×24 print of my negative image, I soaked it in water overnight. This process helped loosen the emulsion off the paper, which you can see in the second photo below. Unfortunately this was my first time peeling the emulsion, so some of it tore in places as it was being peeled. I then took my large paper negative and made a print of it, which gave me a beautiful and unexpected result. You can see in the finished product photo where the negative had torn in the process, by the black cutaways, and where the negative was peeling up during the exposure. I chose to not correct it, since I preferred the uniqueness of the image, and the experience I got doing it, over perfection.
Slide Film printed on a 20x24 sheet of paper in the color darkroom. Since the slide is a positive film, it creates a "negative" on the paper.

First Step: Slide Film printed on a 20×24 sheet of paper in the color darkroom. Since the slide is a positive film, it creates a “negative” on the paper.
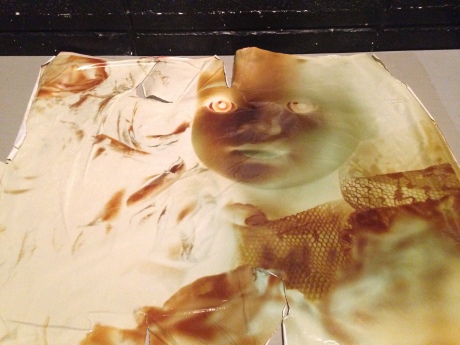
Soaked the paper negative in water overnight to loosen the emulsion. Once it was thoroughly soaked, I peeled the emulsion off of the paper.

Step Two: Soaked the paper negative in water overnight to loosen the emulsion. Once it was thoroughly soaked, I peeled the emulsion off of the paper.

Step 3: Paper negative was printed directly unto the 20x24 paper, resulting in a positive 20x24 print of my slide.

Step 3: Paper negative was printed directly unto the 20×24 paper, resulting in a positive 20×24 print of my slide.

IMG_0621

Last Summer I was fortunate enough to be in the last group of students to take what easily became my favorite class so far, Custom Color Print. This darkroom experience was different than the traditional black and white darkroom, where you were in a large open room with other students under the glow of the red safety light. To print on color darkroom paper you need to be in complete darkness, therefore no safety lights, and each student was alone in there own small room. I remember thinking during my first walk down the rather creepy hallway to my assigned color print room, that there was no way I was going to enjoy this class; that was until I saw my first print come out of the printer. From that first print on, I knew it was love. I couldn’t get enough of how beautiful the colors looked; I had never seen anything like it.

We were told early on in this course that we would be the last group of students going through this course, as the chemistry was becoming increasingly more expensive and the school’s supply was low. Knowing this, I shot more film than ever, just to have the ability to print them in this traditional way. A few of the instructors left us boxes of old paper in various sizes that we were allowed to experiment with. Some of the paper was way past the expiration date, and others were completely light fogged; but it was the unpredictable nature of these papers that made the printing process that much more fun. The night that the printer had run its final print and ran out of the last drop of chemistry, was very hard to take in. This class came at a time when I was feeling so much pressure from all my classes and was in a creative slump. Having the ability to experiment and make art in this new way was so freeing, and an experience I am incredibly grateful for.

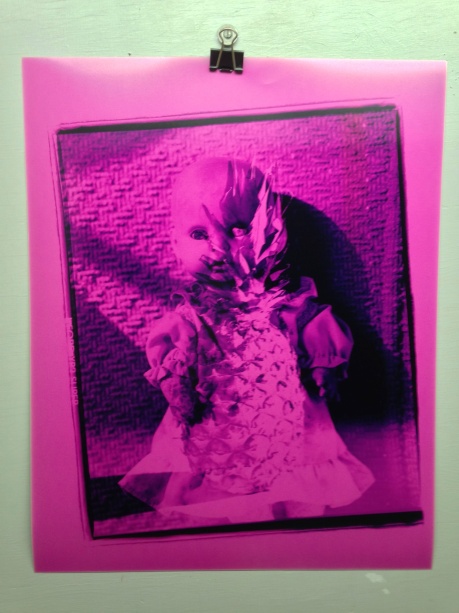
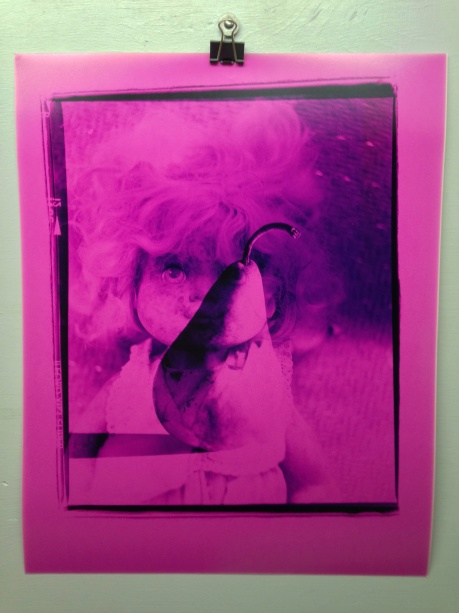
The images in this post were actually Ilford Medium Format black and white negatives, that I stacked on top of each other to create a double exposure and printed in the color darkroom. The images get their pink color from heat damaged paper that is over 10 years old.

IMG_0623

IMG_0628

IMG_0641

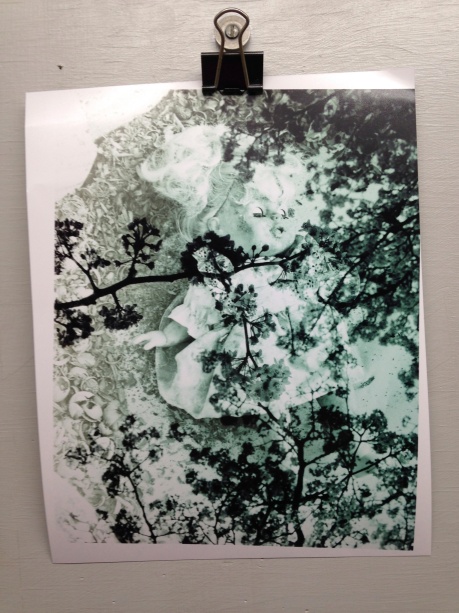
Two black and white negatives, stacked, and printed in a color dark room to give a blue tint.

blog1 (1 of 1)


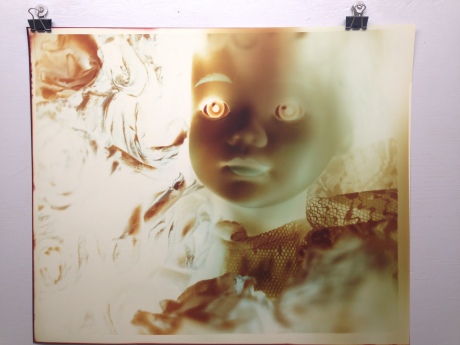
This is a photo I took on my iPhone of a print from a double exposed black and white medium format negative I printed in a color RA-4 process. This process allowed me to alter the black and white saturation to a more sepia warm-toned print. I really like the layering look and feel of stacking a negative during exposure, as well as being able to control the tonality of the print before processing. I have been experimenting a lot with this process, and have been very excited with the results. To see more of my images, follow me on Instagram!